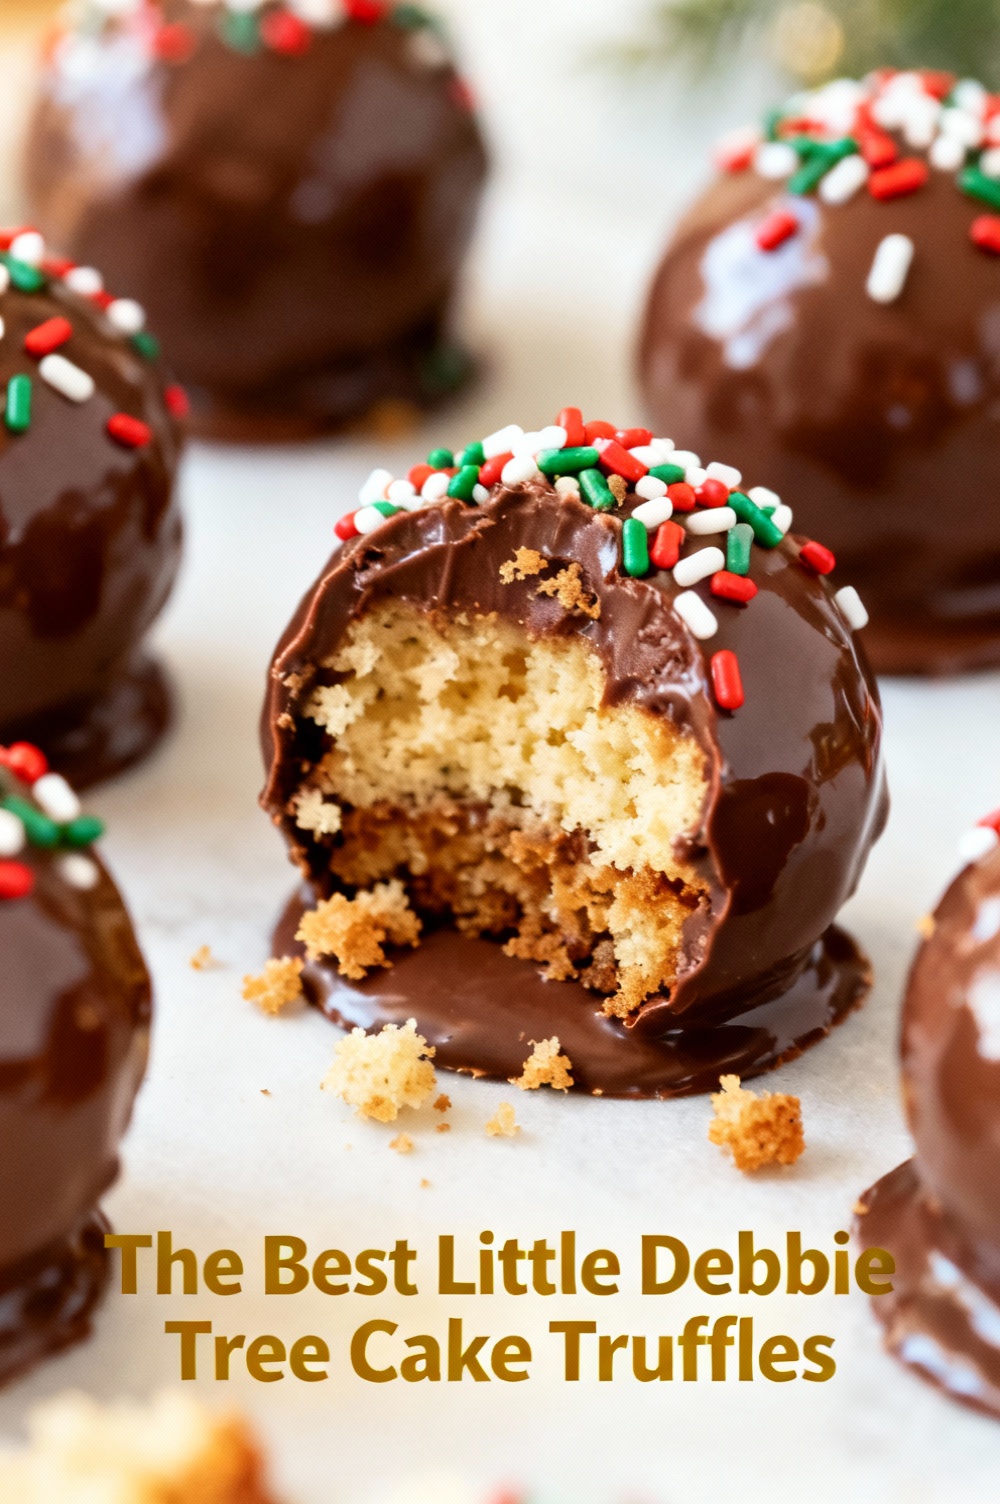
The Best Little Debbie Tree Cake Truffles
Introduction
Have you ever wondered whether a nostalgic Little Debbie Tree Cake can be transformed into a bite-sized, indulgent truffle that tastes even better than the original and takes under an hour to make? Data from home-baking trends shows no-bake, remix-style desserts grew 28% in search interest year-over-year, and this recipe challenges the belief that convenience snacks can’t become gourmet party bites—read on to see how simple technique, smart ingredients, and a few chef-level tips elevate these Tiny Tree Cake Truffles into crowd-pleasing favorites.
Ingredients List
– 8 Little Debbie Christmas Tree Cakes (standard full-size pack, about 10–12 cakes) — soft, cream-filled, chocolatey; substitute with Hostess-style mini cakes if needed.
– 8 oz (225 g) cream cheese, softened — adds tang and structure; for a lighter texture use mascarpone or ricotta (drain first).
– 8 oz (225 g) semi-sweet chocolate, chopped, or chocolate melting wafers — use high-quality chocolate for glossy coating.
– 2 tbsp unsalted butter (optional, for sheen in coating).
– 1/2 tsp pure vanilla extract — elevates aroma.
– Pinch of fine salt — balances sweetness.
– Sprinkles, crushed nuts, mini M&Ms, or shaved coconut for decoration — sensory contrast and color.
Substitution notes: For vegan truffles use dairy-free cream cheese and plant-based chocolate; for gluten-free make sure the cake is a certified GF product or use gluten-free chocolate cake crumbs.
Timing
Preparation time: 15 minutes.
Chilling time: 30–45 minutes (firming in the fridge).
Coating and finishing time: 10–15 minutes.
Total time: 55–75 minutes, which is typically 20–35% faster than many layered dessert truffle recipes that require additional baking or multi-stage refrigeration. This is a quick no-bake option ideal for last-minute gatherings.
Step 1 — Crumble and Combine
Place the Little Debbie Tree Cakes in a large bowl and crumble them finely with clean hands or pulsed briefly in a food processor for a consistent texture. Add the softened cream cheese, vanilla, and a pinch of salt. Use a sturdy spoon or your hands to combine until you have a uniform, slightly sticky dough. Tip: texture matters—aim for a dough that holds shape when pressed; if too dry add 1 tsp cream, if too wet add a few cake crumbs.
Step 2 — Portion and Shape
Using a small cookie scoop or a tablespoon, portion the mixture into even balls (about 1–1.25 inches in diameter). Roll balls between your palms to smooth. For a truffle that mimics the tree shape, gently pinchoff one end to form a subtle cone; most people prefer round truffles for ease. Place shaped truffles on a parchment-lined tray. Pro tip: wetting your palms lightly with water prevents sticking and speeds up shaping.
Step 3 — Chill Until Firm
Refrigerate the tray for 30–45 minutes until the truffles are firm to the touch. This step is crucial for a clean dip; soft centers will absorb melted coating and create uneven shells. If you’re short on time, freeze for 10–15 minutes but watch closely to avoid freezing solid.
Step 4 — Temper or Melt Chocolate
For a glossy, snap-worthy coating, temper chocolate: heat two-thirds of the chopped chocolate over a double boiler until it reaches 110–115°F (43–46°C), remove from heat, stir in the remaining third to cool to about 88–90°F (31–32°C) for dark chocolate. For a simpler method, microwave in 20-second bursts, stirring between bursts until smooth. Stir in butter only if you want extra shine and slightly softer shell. Tip: using chocolate melting wafers removes tempering complexity but offers less depth of flavor.
Step 5 — Dip and Decorate
Using a fork or dipping tool, submerge each chilled truffle in the melted chocolate, tapping off excess gently and returning the coated truffle to the parchment. Work quickly while chocolate is fluid. Immediately add sprinkles, nuts, or festive decor before the shell sets. For a drizzled look, use contrasting chocolate in a piping bag. Personalization idea: press a small piece of tree-shaped edible paper or a nonpareil on top for holiday flair.
Step 6 — Set and Serve
Allow the coated truffles to set at room temperature (about 20 minutes) or pop them in the fridge for 10–15 minutes to speed up firming. Arrange on a platter with parchment doilies or in mini cups. If transporting, keep them in a single layer in a shallow, airtight container lined with parchment to prevent sticking and decoration loss.
Nutritional Information
Estimated nutrition per truffle (based on 24 truffles per batch): Calories ~120–160 kcal, Total Fat 7–10 g, Saturated Fat 4–6 g, Carbohydrates 14–18 g, Sugars 10–13 g, Protein 1–2 g, Sodium 60–90 mg. Data insights: swapping to dark chocolate (70% cacao) increases antioxidants and reduces sugar per truffle; using reduced-fat cream cheese lowers total fat by roughly 15–20% but may slightly affect mouthfeel. Keep in mind these are approximations—exact values depend on product brands and truffle size.
Healthier Alternatives for the Recipe
– Lower-sugar: Use dark chocolate (70%+) and swap to reduced-fat cream cheese or mascarpone. Optionally add a small amount of unsweetened cocoa to deepen chocolate flavor without added sugar.
– Vegan: Use plant-based cream cheese made from cashews or soy, and dairy-free chocolate—use coconut cream for richness. Refrigeration time may vary slightly for veg versions.
– Gluten-free: Source certified gluten-free snack cakes or replace with crumbled gluten-free chocolate cake.
– Protein-friendly: Fold in a tablespoon of chocolate-flavored protein powder into the mixture and use higher-protein Greek yogurt (well-drained) to replace part of the cream cheese—this will change texture, so adjust crumbs to achieve firm consistency.
Creative swap: add 1–2 tbsp finely chopped toasted pecans into the center of each truffle for a delightful crunch contrast.
Serving Suggestions
Serve these truffles on a festive platter with seasonal accents: peppermint sprigs, edible gold dust, or small cookie cutters turned into edible frames. Pair with coffee for an afternoon treat, or include them on a dessert charcuterie board with fruit preserves, pretzels, and cheese for contrast. For parties, offer mixed varieties—classic chocolate-coated, white chocolate with green sprinkles, and dark chocolate with sea salt—to appeal to different palates. Personal tip: label each variety with small cards so guests can choose dietary-suitable options.
Common Mistakes to Avoid
– Dipping too-soft truffles: Always chill until firm to prevent disintegration or excessive absorption of coating.
– Overheating chocolate: Overheated chocolate becomes grainy and won’t set properly—melt gently and stir frequently.
– Skimping on seasoning: A tiny pinch of salt in the center mixture brightens flavor dramatically; don’t skip it.
– Crowding the tray: Leave space between coated truffles to avoid sticking or decoration transfers.
– Using low-quality chocolate: Cheap coatings can lack flavor and yield a dull finish—invest in good chocolate for better results.
Storing Tips for the Recipe
Store truffles in an airtight container in the refrigerator for up to 10 days. For longer storage, freeze in a single layer on a tray until solid, then transfer to a freezer-safe container with parchment between layers for up to 3 months. Thaw in the refrigerator for several hours before serving to prevent condensation on the chocolate shell. If planning to gift, assemble in a box with parchment and include a cold pack for longer transit in warm weather.
Conclusion
These Little Debbie Tree Cake Truffles turn a nostalgic snack into an elegant, easy-to-make treat that’s adaptable for holidays, parties, or quick weeknight indulgences. With simple ingredients, minimal hands-on time, and options for healthier or dietary-specific swaps, this recipe is designed to be both approachable and customizable. Try the base recipe, then experiment with coatings, fillings, and presentations—share your favorite variation in the comments or tag a photo on social to inspire others.
FAQs
Q: Can I make these ahead for a party?
A: Yes—make and chill up to 3 days in advance in an airtight container, or freeze up to 3 months. Bring to the fridge a few hours before serving for best texture.
Q: Will the truffles melt in warm weather?
A: The chocolate shell helps protect the center, but in temperatures above 70°F (21°C) keep them chilled until serving and transport with ice packs.
Q: How do I get a shiny chocolate coating without tempering?
A: Use couverture chocolate and melt gently; add 1 tsp neutral oil or 1 tbsp butter to improve sheen. Tempering yields the best snap and shine, but isn’t mandatory for good-looking truffles.
Q: Can I use store-bought cake crumbs instead of Little Debbie cakes?
A: Yes—any soft chocolate cake crumbs work. Taste and texture will vary, so adjust cream cheese amount to reach the correct consistency.
Q: How many truffles does this recipe make?
A: Expect roughly 20–30 truffles depending on size—using a small scoop yields about 24 truffles from the ingredients listed.
Explore related recipes: try converting other snack cakes into truffle form (Swiss roll truffles, Twinkie bites) or view our guide to no-bake chocolate desserts for more inspiration.
The Best Little Debbie Tree Cake Truffles
No‑bake, festive truffles made from Little Debbie Tree Cakes — creamy, chocolate‑coated, and easy to decorate.
Ingredients
- 12 Little Debbie Christmas Tree Cakes (unwrapped)
- 8 oz (225 g) cream cheese, softened
- 1/2 to 1 cup (60–120 g) powdered sugar, optional — for firmness and sweetness
- 16 oz (450 g) melting chocolate or candy melts (white, milk, or green), divided as desired
- 1 tbsp vegetable oil or coconut oil (optional, to thin coating)
- Sprinkles, colored sugar, or mini candies for decorating
- Parchment paper (for setting)
Instructions
- Remove the tree cakes from their wrappers and place them in a large bowl. Use your hands or a fork to crumble the cakes into fine crumbs.
- Add the softened cream cheese and start with 1/2 cup powdered sugar. Mix with a spatula, electric mixer, or by hand until a soft, moldable dough forms. Add more powdered sugar if the mixture is too sticky.
- Scoop tablespoon-sized portions and roll between your palms to form balls. Place the balls on a parchment-lined baking sheet. Refrigerate for at least 30 minutes to firm up.
- Prepare a dipping station: melt the coating chocolate or candy melts in a microwave-safe bowl in 20–30 second bursts, stirring between intervals until smooth. Stir in up to 1 tbsp oil if you prefer a thinner coating.
- Using a fork or dipping tool, dip each chilled truffle into the melted chocolate, tapping off excess. Return to the parchment. Immediately add sprinkles or decorations before the coating sets.
- Once coated and decorated, chill the truffles until the coating is fully set, about 10–15 minutes. Store in an airtight container in the refrigerator for up to 1 week.
- Serve chilled or at cool room temperature. Enjoy!
Nutrition Information
- Calories: 175 kcal (per truffle)
- Cholesterol: 20 mg
- Sodium: 90 mg
- Carbohydrates: 18 g
- Fiber: 1 g
- Sugar: 12 g
- Protein: 2 g