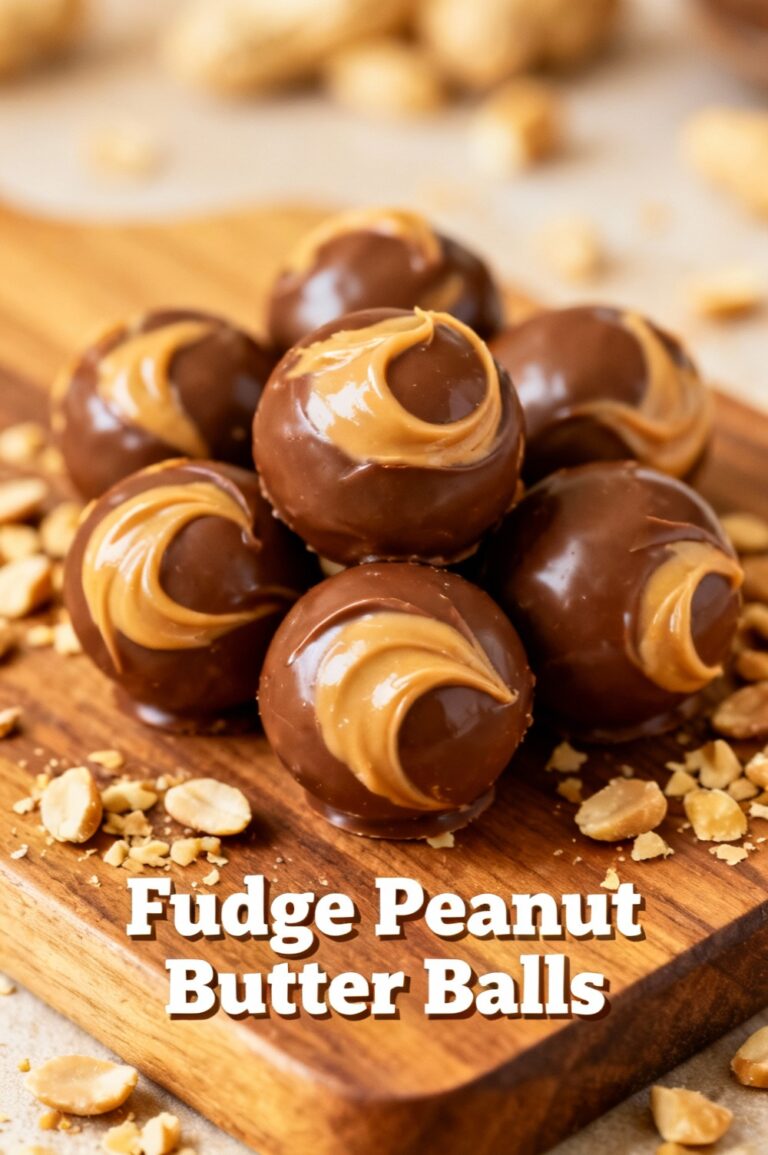
Peanut Butter Chocolate Drops
Introduction:
Have you ever wondered why a bite-sized peanut butter chocolate drop can feel both indulgent and surprisingly efficient as a snack—delivering comfort, protein, and pure nostalgia in under two minutes per piece? Data from snacking trends shows consumers increasingly choose portable treats that balance taste and convenience, and this recipe for peanut butter chocolate drops does exactly that while challenging the idea that indulgent sweets must be complicated or time-consuming.
Ingredients List:
- 1 cup (250–260 g) creamy peanut butter — choose natural for a roasted, nutty depth; substitute almond butter or sunflower seed butter (for nut-free) using a 1:1 ratio.
- 1 cup (120 g) powdered sugar — for a smoother texture. Substitutions: ¾ cup powdered erythritol for lower sugar, or 1 cup coconut sugar powdered in a blender for a less-refined alternative.
- 2 tablespoons (28 g) unsalted butter, softened — swap with coconut oil (solid) for dairy-free or omit and add 1–2 tbsp more peanut butter for denser texture.
- 1 teaspoon vanilla extract — optional but elevates flavor.
- Pinch of fine sea salt — enhances chocolate and peanut contrast; reduce if using salted peanut butter.
- 8 oz (227 g) semi-sweet or dark chocolate chips — choose 70% dark for more antioxidant-rich chocolate; use vegan chips to keep recipe dairy-free.
- Optional mix-ins: ¼ cup finely chopped roasted peanuts (for crunch), 2 tablespoons rolled oats (for chew and fiber), 1 tablespoon cocoa nibs, or 1 scoop neutral protein powder (to boost protein content).
Timing:
Prep time: 10 minutes.
Chill time: 20–30 minutes.
Assembly/coating time: 15–20 minutes.
Total time: ~45–60 minutes (including chilling). That’s about 20–40% faster than many filled-chocolate recipes that require tempering chocolate or baking, making this a fast no-bake option for busy cooks.
Step 1: Prepare your workspace and ingredients
Line a baking sheet with parchment or a silicone mat and set out a small cookie scoop or tablespoon. Measure ingredients precisely—consistent measurements produce uniform drops. Tip: If your peanut butter is very runny, refrigerate it 15 minutes first; slightly thicker peanut butter reduces spread and helps shaping.
Step 2: Make the peanut butter filling
In a medium bowl, beat the peanut butter, softened butter (or coconut oil), vanilla, and pinch of salt until creamy. Gradually mix in powdered sugar until a smooth, pipeable dough forms. If using oats or protein powder, fold them in now. Personalized tip: For a less-sweet profile, reduce powdered sugar by 20% and add a teaspoon of maple syrup to maintain texture.
Step 3: Portion and chill the filling
Scoop uniform balls (about 1 tablespoon each) onto your prepared sheet, pressing them into slightly flattened discs if you prefer a thicker chocolate ratio. Freeze or refrigerate for 20–30 minutes until firm—this helps prevent melting when dipped. Data-backed note: chilling reduces surface temperature and yields cleaner chocolate coating, according to pastry best practices.
Step 4: Melt the chocolate properly
Use a double boiler or microwave in 20–30 second bursts, stirring between intervals until smooth. If microwaving, stop when small unmelted chips remain and stir to finish—this prevents seizing. Add 1 teaspoon neutral oil (e.g., avocado or coconut) for a glossier finish. Tip: Never let water touch the chocolate; even a drop can seize it.
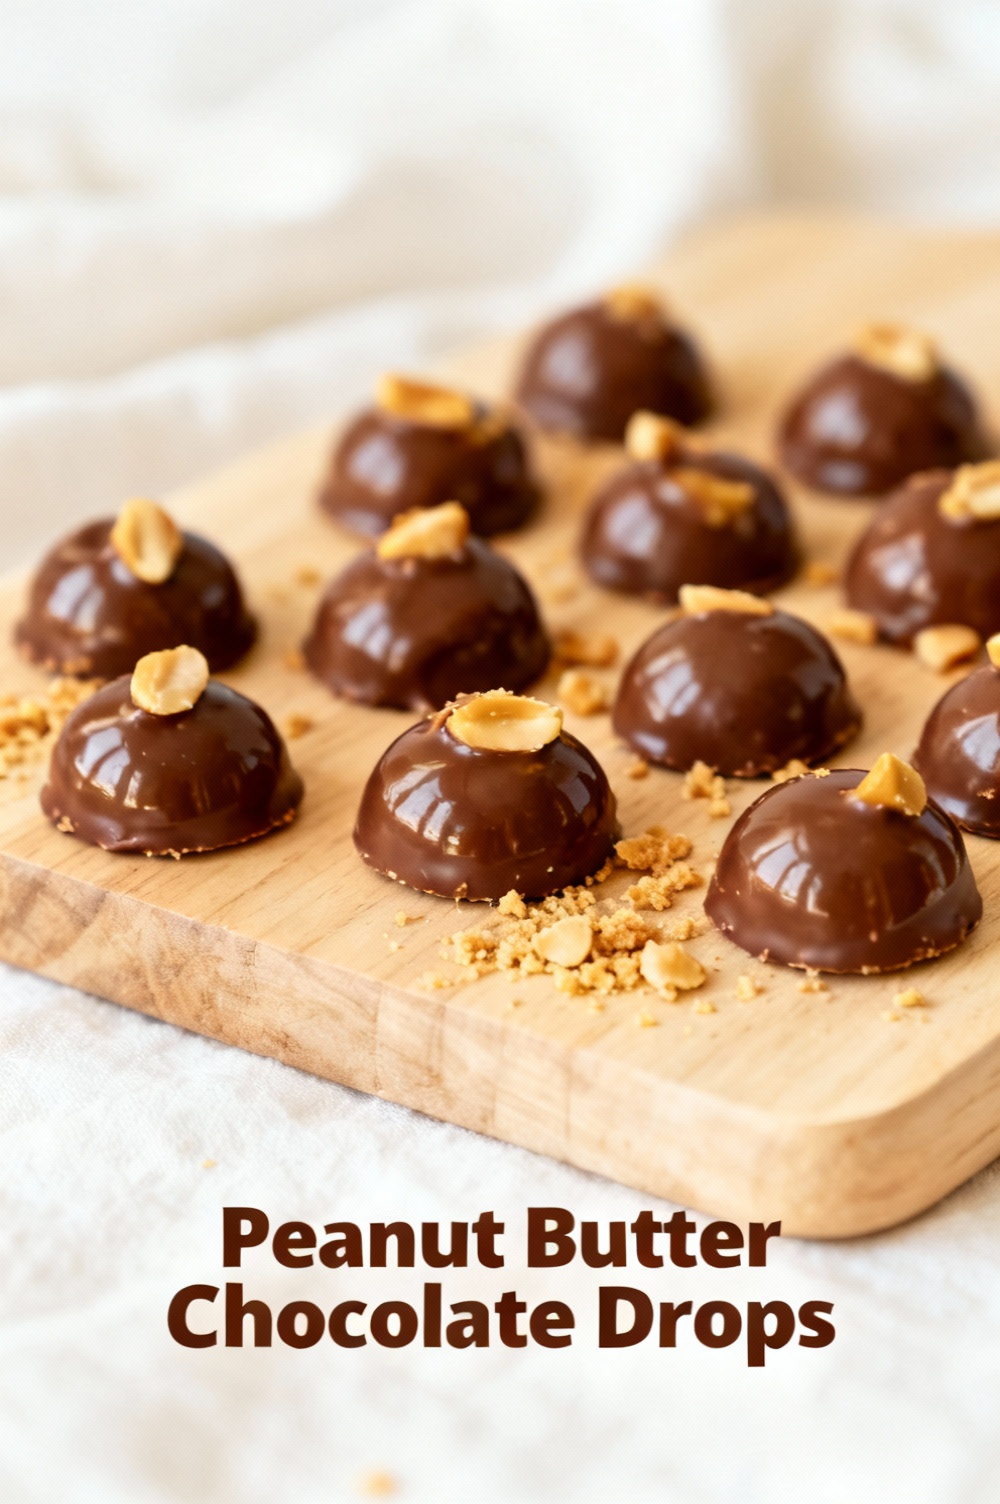
Step 5: Coat the peanut butter drops
Using a fork or dipping tool, submerge chilled discs in melted chocolate, tapping off excess and returning them to the lined sheet. Sprinkle flaky sea salt, cocoa nibs, or crushed pretzel immediately for texture. Personalized tip: If you want partial coverage, drizzle rather than dip to control chocolate-to-peanut ratio.
Step 6: Set and store
Let coated drops set at room temp for 10–15 minutes or speed up by chilling for 5–10 minutes. For a glossy finish, allow chocolate to temper or cool slowly at room temperature before refrigerating; for most home use, a short chill is fine. Serve within a few hours or transfer to storage as below.
Nutritional Information:
Estimated per batch (makes ~24 drops):
- Total calories: ~3,200–3,400 kcal.
- Total fat: ~220–240 g.
- Total carbohydrates: ~320–340 g.
- Total protein: ~60–70 g.
Estimated per drop (1 of 24): ~130–145 kcal; fat 9–10 g; carbs 12–14 g; protein 2.5–3 g; sugar 9–11 g; fiber 1–2 g. These figures are approximations based on typical ingredient values (peanut butter ~588 kcal/100 g; powdered sugar ~400 kcal/100 g; semi-sweet chocolate ~480 kcal/100 g) and will vary with substitutions (e.g., dark chocolate reduces sugar, protein powder increases protein). For precision, plug your exact brands into a nutrition calculator or app.
Healthier Alternatives for the Recipe:
- Lower sugar: Replace powdered sugar with powdered erythritol or allulose 1:1 to keep texture while cutting sugar impact.
- Higher protein: Fold 1–2 scoops neutral-flavored whey or plant protein into the peanut butter mixture, but add a splash of liquid (water or nut milk) if mixture becomes too dry.
- Lower fat: Replace half the peanut butter with Greek yogurt powder (dehydrated) or use powdered peanut butter reconstituted with less oil.
- Keto: Use powdered erythritol + unsweetened peanut butter + 85% dark chocolate; estimate carbs per drop 2–4 g.
- Allergy-friendly: Use sunflower seed butter and dairy-free chocolate; add a touch of lemon or extra vanilla to counter slight bitterness.
- Add fiber and texture: Mix in ¼–⅓ cup finely ground oats or flaxseed meal to increase satiety and nutritional value.
Serving Suggestions:
Arrange on a platter with alternating toppings—sea salt, crushed pretzel, toasted coconut—for visual appeal. Serve with:
- A small espresso shot or cold brew for a modern café pairing.
- Sliced apples or banana for a fruit + indulgence combo.
- Crushed graham crackers for s’mores-inspired bites.
Personalized serving tip: For after-school snacks, halve recipe size and pack in mini muffin liners; for parties, serve on skewers with berries between drops for a balanced plate.
Common Mistakes to Avoid:
- Using runny natural peanut butter without compensating: leads to falling-apart drops—use a thicker nut butter or add more powdered sugar.
- Overheating chocolate: causes grainy, dull coating—melt slowly and remove from heat early.
- Skipping chilling: filling will bleed into chocolate, producing uneven coating.
- Measuring by eye: inaccurate texture—use cups or a kitchen scale for consistent results.
- Storing at room temp in warm climates: chocolate will bloom or melt—refrigerate if ambient temp exceeds 70°F (21°C).
Storing Tips for the Recipe:
- Refrigerator: Store in an airtight container layered with parchment paper for up to 2 weeks. Bring to room temperature 10–15 minutes before serving for best texture.
- Freezer: Freeze on a tray until solid, then transfer to a freezer-safe bag for up to 3 months. Thaw in fridge overnight to prevent condensation.
- Prep-ahead: Make filling, freeze in portions, and dip later to save time—the filling keeps well frozen and dipping is faster when discs are fully firm.
- Travel tip: Pack in an insulated cooler with ice packs for events; avoid direct heat to prevent melting.
Conclusion:
Peanut butter chocolate drops are a practical, flexible treat that delivers big flavor with minimal fuss. With a few smart swaps—dark chocolate, powdered erythritol, or added protein—you can tailor this snack to fit health goals, dietary needs, or flavor preferences. Try the recipe, tweak one variable (like chocolate percentage or sugar amount), and share what works best for your taste. Want variations? Leave a comment or check related posts for buckeye bites, no-bake cookies, or almond butter truffles.
FAQs:
Q: Can I use natural peanut butter that separates? A: Yes—stir thoroughly before measuring. If still runny, add 1–2 tablespoons more powdered sugar or chill briefly to firm up. Q: How do I keep chocolate shiny? A: Add a teaspoon of neutral oil, melt gently, and avoid humidity. Proper tempering yields the glossiest shell but isn’t required for home use. Q: Can I make these sugar-free? A: Substitute powdered erythritol or allulose 1:1; texture remains similar but erythritol can have a cooling effect. Q: Are these freezer-friendly? A: Yes—freeze on a tray then store in an airtight bag for up to 3 months; thaw in fridge. Q: How many does this recipe make? A: About 24 standard (1-tablespoon) drops; halve or double the recipe to suit your needs. Q: Can I add mix-ins like oats or protein powder? A: Absolutely—add gradually and adjust powdered sugar to reach workable consistency; oats increase fiber and chewiness, protein boosts satiety. Q: What’s the best chocolate to use? A: Use good-quality semi-sweet or 70% dark for balance; vegan chips work for dairy-free diets. If you want less sugar, pick higher cocoa percentages.
Explore related recipes for more no-bake options (buckeyes, chocolate-covered dates, or yogurt pretzel bites) and try swapping one ingredient at a time to discover your perfect peanut butter chocolate drop.
Peanut Butter Chocolate Drops
Soft, chewy peanut butter cookies dotted with chocolate chips — quick, family-friendly, and irresistibly chocolatey.
Ingredients
- 1/2 cup (115g) unsalted butter, softened
- 1/2 cup (125g) creamy peanut butter
- 1 cup (200g) granulated sugar
- 1/2 cup (110g) light brown sugar, packed
- 1 large egg, room temperature
- 1 tsp vanilla extract
- 1 1/4 cups (155g) all-purpose flour
- 1 tsp baking soda
- 1/2 tsp salt
- 1 cup (170g) semisweet chocolate chips
- Flaky sea salt, for sprinkling (optional)
Instructions
- Preheat the oven to 350°F (175°C). Line two baking sheets with parchment paper or silicone mats.
- In a large bowl, cream together the softened butter, peanut butter, granulated sugar, and brown sugar until light and fluffy (about 2–3 minutes) using a hand mixer or stand mixer.
- Beat in the egg and vanilla until fully incorporated.
- In a separate bowl, whisk together the flour, baking soda, and salt. Gradually add the dry ingredients to the wet mixture and mix until just combined.
- Fold in the chocolate chips with a spatula, saving a few to press on top if desired.
- Using a tablespoon or small cookie scoop, drop rounded balls of dough (about 1 tbsp each) onto the prepared baking sheets, spacing about 2 inches apart. Press a few extra chocolate chips on top and sprinkle lightly with flaky sea salt if using.
- Bake for 10–12 minutes, until the edges are set and the centers still look slightly soft. Avoid overbaking for a chewy texture.
- Allow cookies to cool on the baking sheet for 5 minutes, then transfer to a wire rack to cool completely. Store in an airtight container at room temperature for up to 4 days.
Nutrition Information
- Calories: 175 kcal (per cookie)
- Cholesterol: 20 mg
- Sodium: 95 mg
- Carbohydrates: 18 g
- Fiber: 1.5 g
- Sugar: 11 g
- Protein: 4.5 g