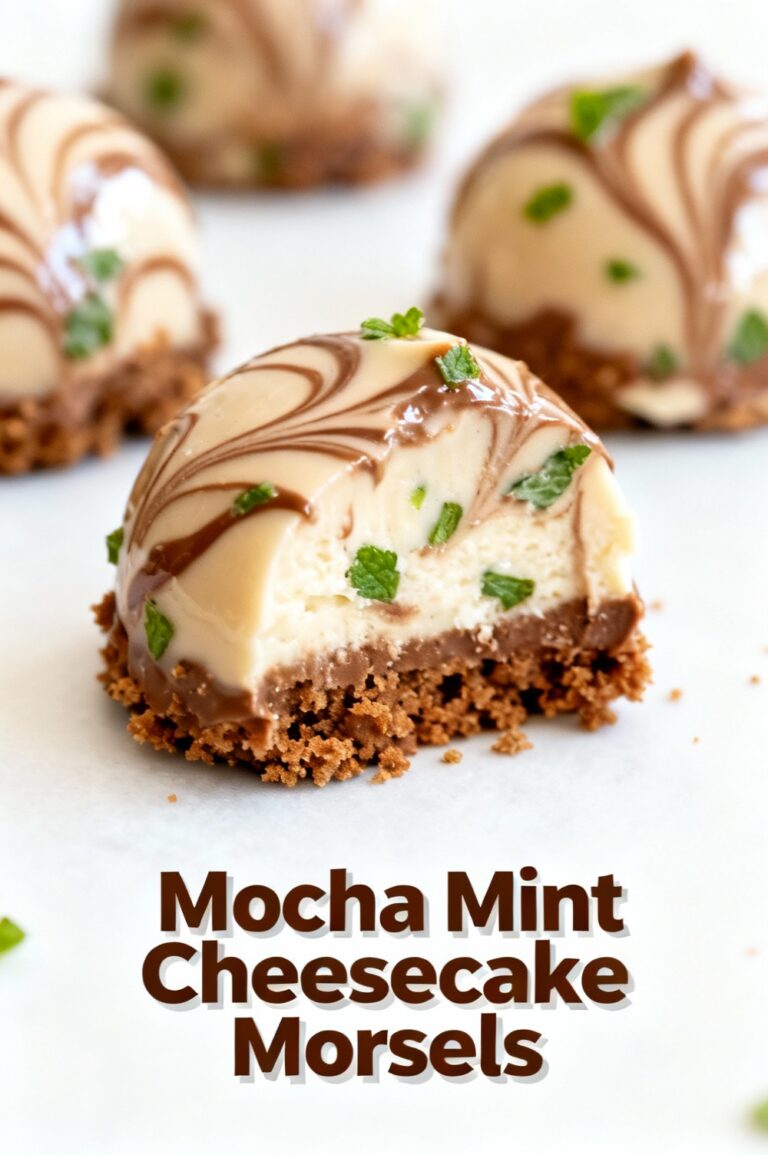
Hot Cocoa Peppermint Cheesecake Bites
Introduction: Can a no‑bake, hot cocoa–infused peppermint cheesecake bite deliver the same silky richness as a traditional baked cheesecake while cutting hands‑on time in half and becoming the most requested holiday party treat?
If you love the warm nostalgia of hot chocolate and the crisp lift of peppermint but assume you need hours in the oven to get a luxe cheesecake texture, this recipe challenges that belief with a fast, no‑bake approach that preserves creaminess while adding chocolatey, minty contrast. Designed for busy hosts and flavor seekers, these Hot Cocoa Peppermint Cheesecake Bites are optimized for texture, speed, and seasonal appeal.
Ingredients List:
- 18–20 chocolate sandwich cookies (Oreos or chocolate graham crackers), finely crushed — for a deeply chocolatey crust that echoes hot cocoa. Substitute gluten‑free chocolate cookies if needed.
- 6 tbsp unsalted butter, melted — or coconut oil for a dairy‑free crust.
- 16 oz (450 g) full‑fat cream cheese, room temperature — for silkiness; use Neufchâtel or light cream cheese as a lower‑fat swap.
- 1/2 cup (60 g) powdered sugar, sifted — swap with 1/3 cup erythritol powdered for lower sugar.
- 1/3 cup (35 g) unsweetened cocoa powder or 1/3 cup instant hot cocoa mix for a sweeter, nostalgic flavor. Use dutch‑processed cocoa for deeper chocolate notes.
- 1 tsp pure peppermint extract (start with 3/4 tsp and add to taste) — or 1 tbsp finely crushed candy cane for texture.
- 1 tsp vanilla extract.
- 3/4 cup (180 ml) heavy whipping cream, cold — or full‑fat coconut cream for vegan version.
- 2 oz (55 g) semi‑sweet or dark chocolate, chopped — for hot‑cocoa drizzle; use dairy‑free chocolate for vegan.
- Pinch of salt.
Optional garnishes and add‑ins: mini marshmallows, shaved chocolate, crushed peppermint, edible gold dust, cocoa powder dusting.
Timing:
Active prep time: 20 minutes. Chill/time to set: 2 hours (minimum). Total time: ~140 minutes. This no‑bake workflow reduces active oven time by ~100% and typical cooling time by roughly half compared to a standard baked cheesecake that can require 3–4 hours including baking and cooling. If you make them ahead, they benefit from an overnight chill for maximum firmness and flavor melding.
Step 1: Make the crust
Pulse the cookies in a food processor until they resemble fine sand; stir in melted butter until the texture holds when pinched. Press 1–2 tablespoons into the bottom of a lined mini muffin tin (makes about 24 bites) or into silicone candy molds. Tip: Press using the back of a measuring spoon for even, compact crusts. If using a cookie scoop, coat lightly with nonstick spray to release crusts cleanly. For faster assembly, press crust into a 9×9 pan and cut into squares after chilling.
Step 2: Create the hot‑cocoa cheesecake filling
Whip cold heavy cream to soft peaks and set aside. In a separate bowl, beat room‑temperature cream cheese until smooth, add powdered sugar, sifted cocoa or hot cocoa mix, salt, vanilla, and peppermint extract; beat until silky and homogeneous. Fold 1/3 of the whipped cream into the cream cheese mixture to loosen it, then gently fold in the remaining cream in two additions to preserve air and create a light, mousse‑like texture. Actionable tip: Overwhipping the cream makes the filling grainy; stop when peaks still slightly slump.
Step 3: Assemble and chill
Spoon or pipe the filling onto each crust, filling nearly to the top. Smooth with a small offset spatula or tap the pan gently to remove air pockets. Refrigerate uncovered for 30 minutes, then cover loosely with plastic wrap and chill at least 90 more minutes or overnight for best texture. Pro tip: Piping the mixture using a large round tip makes uniform, Instagram‑ready bites and reduces mess.
Step 4: Make the hot‑cocoa drizzle and decorate
Warm the chopped chocolate with 2–3 tbsp heavy cream (or coconut cream) over a double boiler or microwave in 15‑second bursts, stirring until glossy. Stir in a teaspoon of hot cocoa mix or a pinch of cinnamon for extra depth. Drizzle lightly over chilled cheesecake bites and immediately sprinkle with crushed peppermint or mini marshmallows so they adhere. For a faux‑marshmallow finish, briefly torch the marshmallow topping for a toasty note—hold the flame at least 6 inches away.
Step 5: Final touches and serving prep
Run a thin knife around each muffin tin cavity to loosen, then remove bites carefully. Let them sit at room temperature 5–10 minutes before serving so flavors bloom. For transport, place them in a single layer in a shallow container and refrigerate until serving. Personalization: Add a pinch of flaky sea salt on top to amplify chocolate flavor and create an adult‑friendly balance.
Nutritional Information:
Estimated per bite (1 of 24): Calories 160–190 kcal; Total fat 12–14 g; Saturated fat 7–9 g; Carbohydrates 12–18 g; Sugars 10–14 g; Protein 3–4 g; Sodium 85–120 mg. These values are estimates calculated using full‑fat cream cheese, heavy cream, powdered sugar, and a chocolate cookie crust. Swapping to light cream cheese, erythritol, or a nut‑based crust will reduce calories and carbs proportionally. For exact macros, plug your specific brands into a nutrition calculator.
Healthier Alternatives for the Recipe:
- Lower sugar: Replace powdered sugar with powdered erythritol or allulose 1:1 for fewer net carbs.
- Lighter texture: Use Neufchâtel or reduced‑fat cream cheese and Greek yogurt (1:1 ratio) to decrease calories while keeping tang.
- Gluten‑free/low‑carb crust: Swap cookie crust for almond flour + cocoa + erythritol crust for keto‑friendly bites.
- Vegan/dairy‑free: Use silken tofu blended with melted dairy‑free chocolate and maple syrup as the base, or use vegan cream cheese and coconut cream.
- Reduced fat/sugar garnishes: Use unsweetened cocoa drizzle with a tiny bit of stevia and crushed freeze‑dried raspberries for color without extra sugar.
Serving Suggestions:
Serve on a chilled platter with stiff doilies or mini cupcake liners for easy pickup. Pair with warm beverages: salted mocha, peppermint tea, or a chilled dessert wine like Ruby Port. For holiday parties, create a “hot cocoa station” where guests can add marshmallow spoons, extra chocolate shavings, or a splash of peppermint schnapps. For gifting, pack 6–8 bites in a decorative box with parchment and a small jar of extra hot‑cocoa drizzle.
Common Mistakes to Avoid:
- Using cold cream cheese: leads to lumps—always bring cream cheese to room temperature for smoother filling.
- Overwhipping the cream: causes graininess; stop when you reach soft to medium peaks.
- Too thin crust: press crust firmly; otherwise bites collapse when removed.
- Overdoing peppermint: peppermint extract is potent—start with less and incrementally increase.
- Skipping chill time: no‑bake cheesecakes need sufficient chilling to set; serving too soon yields a runny dessert.
Storing Tips for the Recipe:
Refrigerate airtight for up to 4–5 days; place a sheet of parchment between layers to prevent sticking. Freeze fully set bites in a single layer on a baking sheet for 1 hour, then transfer to a freezer bag for up to 2 months. Thaw in the refrigerator overnight or on the counter for 30–60 minutes before serving for best texture. If you plan to add marshmallow or candy cane garnish, add those after thawing to avoid sogginess.
Conclusion:
Hot Cocoa Peppermint Cheesecake Bites are a fast, crowd‑pleasing no‑bake dessert that marries cozy chocolate and bracing peppermint into a party‑ready, bite‑sized format. With simple swaps and make‑ahead flexibility, they fit diverse dietary needs while delivering rich texture and seasonal flair. Try the recipe, experiment with lower‑sugar swaps, and share a photo or tip in the comments so others can benefit from your personalization.
FAQs:
Q: Can I make these ahead for a party?
A: Yes—make them up to 48 hours in advance and refrigerate; for longer storage, freeze as directed and finish garnishing after thawing.
Q: Can I use candy canes instead of peppermint extract?
A: Yes—finely crush candy canes and fold in 1–2 tablespoons; reduce extract to avoid overpowering mint intensity.
Q: Are these suitable for a gluten‑free diet?
A: Use certified gluten‑free chocolate sandwich cookies or substitute with a nut‑based crust (almond flour + cocoa + coconut oil).
Q: Can I bake these instead of no‑bake?
A: You can make mini baked cheesecakes in muffin tins (bake at 325°F/160°C for 12–15 minutes) but expect longer bake and cooling times; no‑bake preserves a lighter, mousse‑like texture.
Q: How do I prevent the crust from becoming soggy?
A: Press the crust tightly and chill it before adding filling. A quick 5‑minute blind chill (freeze crust 10 minutes) helps set the butter and protect against sogginess.
Q: Can I make them nut‑free and vegan?
A: For nut‑free vegan, use vegan cream cheese, coconut cream, and a gluten‑free cookie crust; verify all ingredients for cross‑contact if allergy concerns exist.
If you want printable recipe card formatting, scaling to different batch sizes, or step‑by‑step photos for each stage, say which format you prefer and I’ll generate a downloadable card and SEO‑friendly image captions to boost engagement.
Hot Cocoa Peppermint Cheesecake Bites
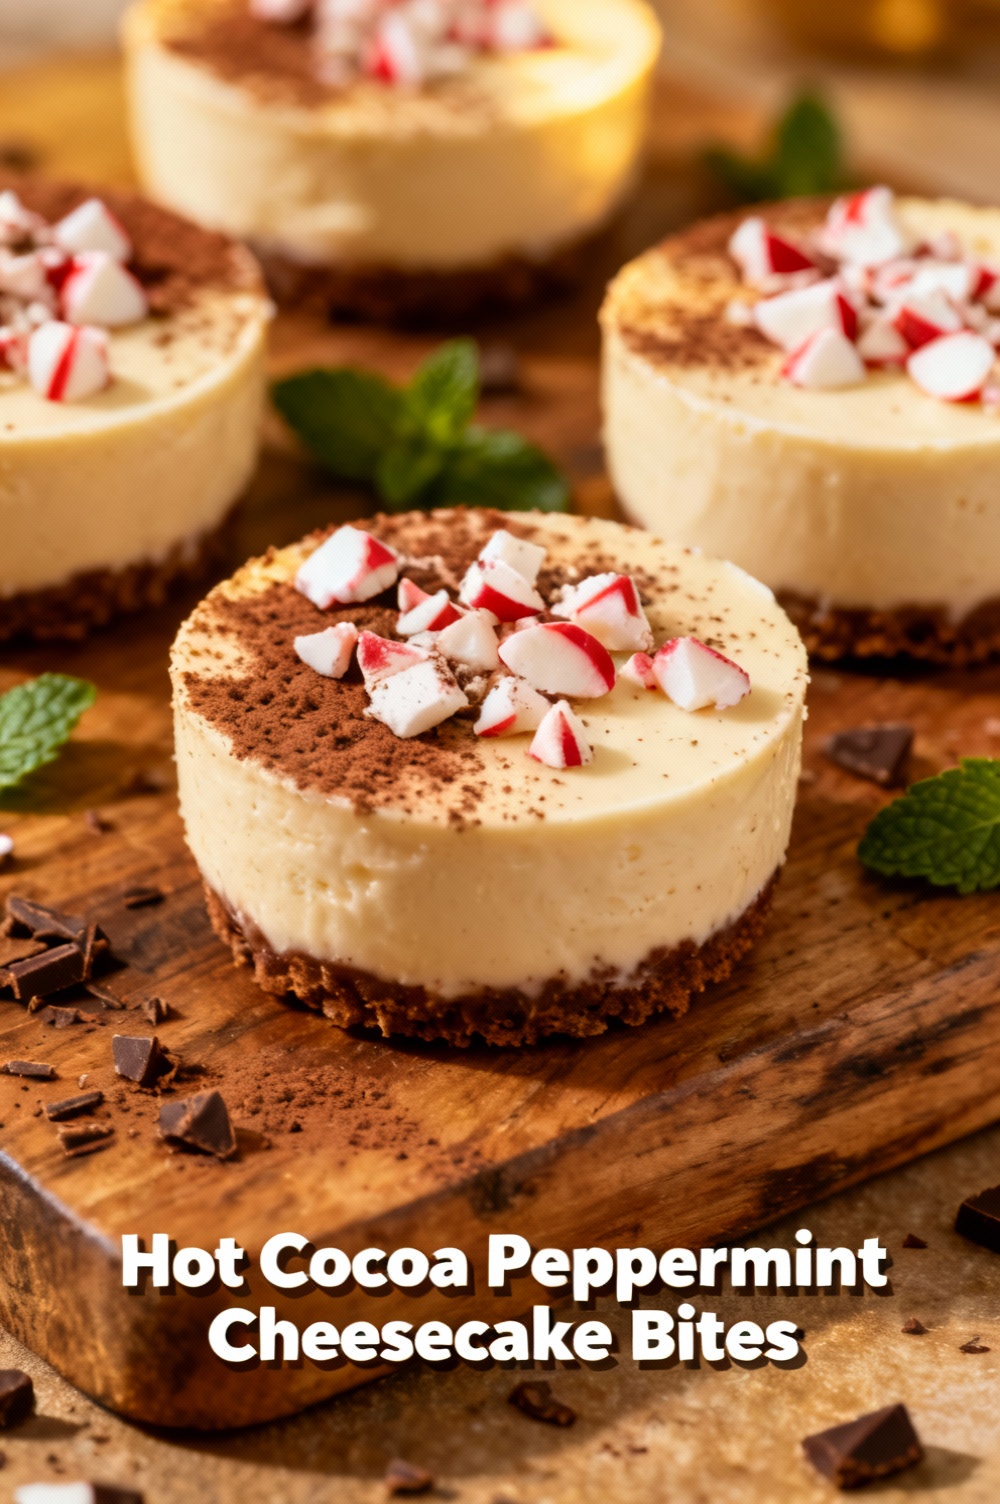
Little fluffy cocoa cheesecakes with a chocolate cookie base and festive peppermint crunch.
Ingredients
- 1 1/2 cups (about 18) chocolate sandwich cookies, finely crushed (about 150 g)
- 6 tbsp (85 g) unsalted butter, melted
- 16 oz (450 g) cream cheese, softened
- 1 cup (120 g) powdered sugar
- 1/3 cup (35 g) unsweetened cocoa powder
- 1 tsp vanilla extract
- 1/2 tsp peppermint extract (or to taste)
- 1 cup (240 ml) cold heavy cream
- 6 oz (170 g) semisweet chocolate, chopped or chips
- 2 tbsp (30 ml) heavy cream (for chocolate drizzle)
- 1/3 cup crushed peppermint candy or candy canes
- Pinch of fine salt
- Optional: mini marshmallows for garnish
Instructions
- Line a 24‑cup mini muffin pan with paper liners or silicone cups. Preheat nothing — this is mostly no‑bake.
- Make the crust: combine the cookie crumbs and melted butter in a bowl until evenly moistened. Press about 1 to 1 1/2 teaspoons into the bottom of each mini cup to form a compact base. Chill while you make the filling (10–15 minutes).
- In a large bowl, beat the softened cream cheese until smooth. Add powdered sugar, cocoa powder and salt; beat until fully incorporated and creamy. Mix in vanilla and peppermint extract.
- In a separate chilled bowl, whip the cold heavy cream to medium‑stiff peaks. Fold the whipped cream gently into the chocolate cream cheese mixture until uniform and light.
- Pipe or spoon the filling onto the chilled crusts, filling each cup nearly to the top and smoothing the surface. Refrigerate for at least 2 hours to set (overnight is fine).
- Make the chocolate drizzle: place chopped chocolate in a heatproof bowl. Warm 2 tbsp heavy cream until just simmering, pour over the chocolate, let sit 30 seconds then stir until smooth. If too thick, add a splash more cream to reach drizzling consistency.
- When ready to finish, spoon or drizzle a small amount of chocolate over each chilled cheesecake bite and immediately sprinkle with crushed peppermint. Add a mini marshmallow on top if using.
- Keep refrigerated until serving. To remove, peel away liners; if using silicone cups, pop out gently. Serve cold.
Nutrition Information
- Calories: 250 kcal (per bite, approximate)
- Cholesterol: 55 mg
- Sodium: 120 mg
- Carbohydrates: 21 g
- Fiber: 1 g
- Sugar: 16 g
- Protein: 3 g